By Lyuesword | 30 June 2020 | 1 Comments
How to Forge A Traditional Samurai Sword
How Is A Traditional Samurai Sword Katana Made
Step 1: Make the steel
The starting steel, tamahagane (steel jewel) is produced by smelting iron sand (sand containing iron ore) with charcoal in a large clay furnace known as a Tatara.
Temperatures inside the tatara would reach up to 2,500 degrees, allowing the carbon, iron and other compounds to evenly dissolve. When finished, the bladesmith would have about one or two tons of high-quality tamahagane steel with which to forge katanas.

Step 2: Sort the steel
The Tamahagane is fragmented into little cubes according to their colour, then they are divided depending on their carbon content. Then the cubes are wormed up and hammered at until they become thin sheets.
The best sheets are selected to create the blade's external covering, the Kawagane (leather-steel) and the Hagane (blade-steel). These sheets are put one on top of the other, heated up and melted together by percussions.

Step 3: Heat the steel
You must heat the material to temperatures nearing 1,600 degrees F (870 degrees C) to make it malleable for forging and to remove impurities. During the heating process, substances like sulfur and silica will oxidize and separate from the iron, creating slag. The removal of slag greatly strengthens the steel.

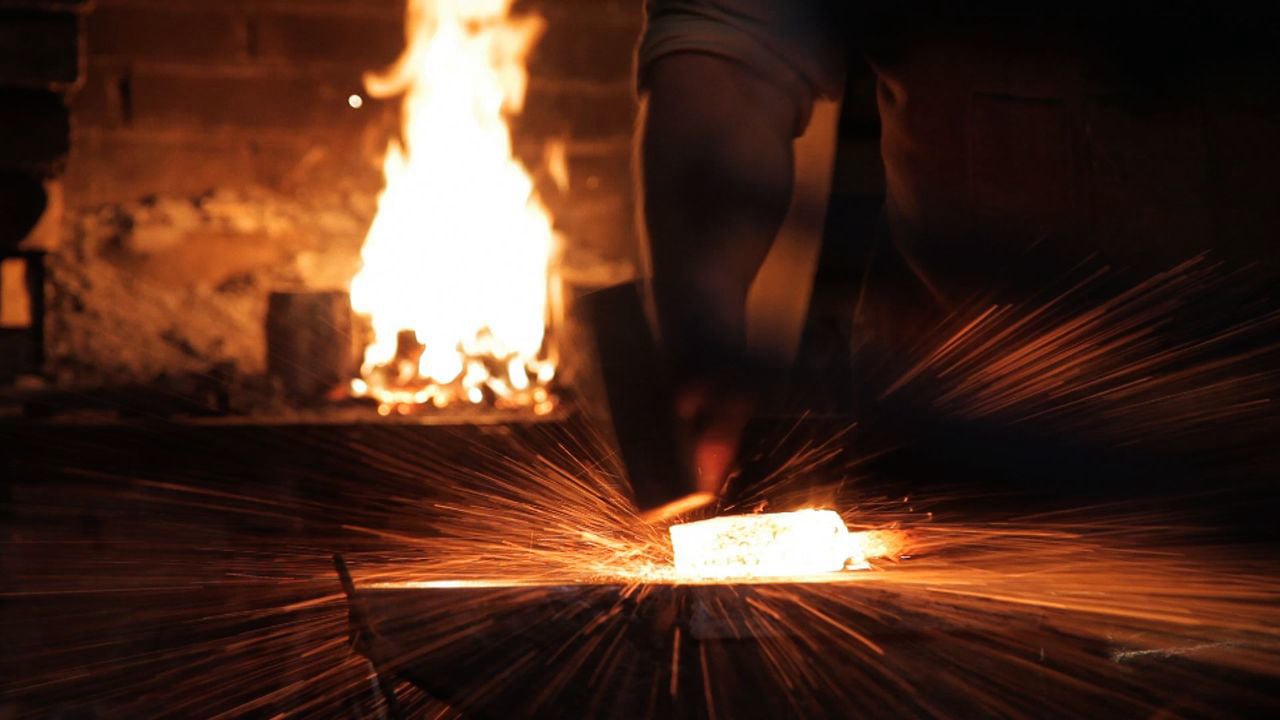
Step 4: Forge the steel
At this point the plank is ready to be forged. It is heated up once more and at its midpoint the blacksmith carries out an incision that is used to fold the steel plank up. Once this is all done, the whole is warmed up and beaten again many times until the two layers, flattened till they regain their original dimensions, are completely melted together.
This process is done again and again for about 6 times and the result is a steel plank formed of thousands of overlapping layers since every time the steel is folded the number of the layers doubles.
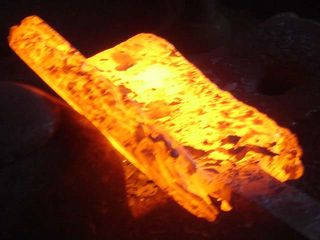
Step 5: *Fold the steel
The steel plant is cut in 4 pieces. These 4 steel planks are put one on top of the other, heated up and melted together by percussions. (Our bladesmiths would perform this "folding" technique up to 12 times). Each time the blade is folded, it becomes stronger.
In the end, the block will be made of thousands of steel layers. The final product of this long process is a steel plank composed of thousands of overlapping layers with a few millimetres of thickness.

Step 6: *Fold the steel
Depending on how the steel is beaten and folded (always in one direction or in different directions), we'll obtain a different frame on the steel's surface (hada).
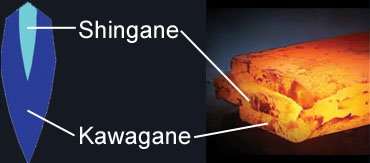
At this point the blacksmith begins with the construction of the Shingane (heart steel), starting from a low carbon steel that is moulded, folded up and hit for about 10 times. The same as high carbon steel.
Now it's time to bring everything back together, the Kawagane is bended as a U and the plank of Shingane is inserted in its inner part.
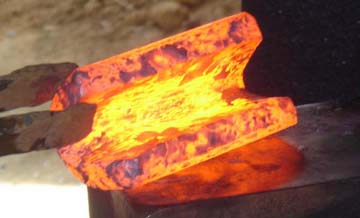
Step 7: Form the blade
The whole is heated up and hit once more until the two layers are completely melted together.
This phase is particularly critical, since the welding has to be very well done and the beating must not displace the two components (the kawagane outside and the shingane inside).
The result of this complicated procedure is a blade with an extremely hard covering that can also be easily sharpened, and a very flexible heart that can easily absorb the shocks without breaking.
Step 8: Shape the blade
Use grinders and files to form the final shape of the blade.
Step 9: Treat the blade with a special clay mixture
Add a mixture of clay and other substances, like grass and feathers, to the blade to achieve desired results. Coat the spine of the blade with the mixture, leaving the edge largely untreated.
This will help make the spine flexible and the edge sharp. Reheat the blade in the forge.

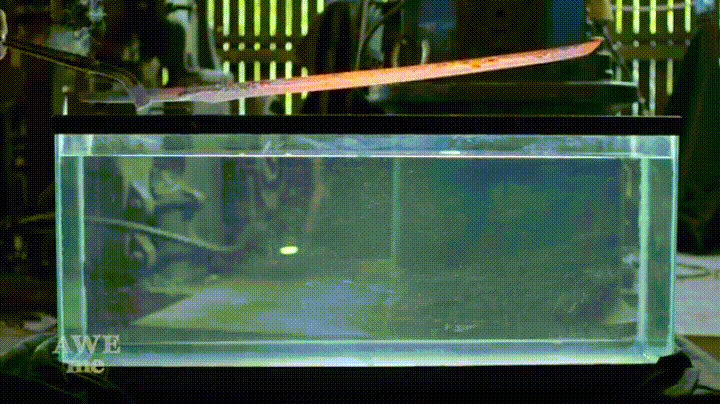
Step 10: Quench the steel
This process both cools and hardens the substance. We usually use water or oil for quenching.
Immerse the blade in water or oil along the edge and tip first. This method has a dual purpose: to make the cutting surface hardest and to keep the back of the blade softer to absorb blows meted out by adversaries. Quenching technique is important as the faster you quench the blade, the harder it becomes.
Step 11: Temper the blade
Reheat the blade to about 400 degrees F (204.4 degrees C) after quenching and then allow it to cool to room temperature.
This process helps balance the blade's flexibility and hardness.
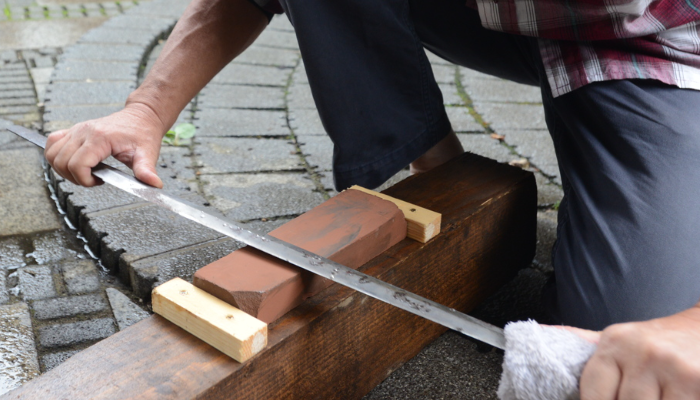
Step 12: Polish the blade
Remove the clay mixture from the blade and grind the blade edge until it is sharp.
Use water stones to sharpen the blade. When polishing is complete, the hardened and unhardened portions of the blade will become apparent. Give the blade a final filing for cosmetic purposes.
Want a unique sword? Feel free to contact us:
Email: lyuesword@hotmail.com
Website: www.lyuesword.com
Custom Sword Page: www.lyuesword.com/Custom-Sword/customization-options/Create-Your-Own-Swords
Step 1: Make the steel
The starting steel, tamahagane (steel jewel) is produced by smelting iron sand (sand containing iron ore) with charcoal in a large clay furnace known as a Tatara.
Temperatures inside the tatara would reach up to 2,500 degrees, allowing the carbon, iron and other compounds to evenly dissolve. When finished, the bladesmith would have about one or two tons of high-quality tamahagane steel with which to forge katanas.

Step 2: Sort the steel
The Tamahagane is fragmented into little cubes according to their colour, then they are divided depending on their carbon content. Then the cubes are wormed up and hammered at until they become thin sheets.
The best sheets are selected to create the blade's external covering, the Kawagane (leather-steel) and the Hagane (blade-steel). These sheets are put one on top of the other, heated up and melted together by percussions.

Step 3: Heat the steel
You must heat the material to temperatures nearing 1,600 degrees F (870 degrees C) to make it malleable for forging and to remove impurities. During the heating process, substances like sulfur and silica will oxidize and separate from the iron, creating slag. The removal of slag greatly strengthens the steel.

Step 4: Forge the steel
At this point the plank is ready to be forged. It is heated up once more and at its midpoint the blacksmith carries out an incision that is used to fold the steel plank up. Once this is all done, the whole is warmed up and beaten again many times until the two layers, flattened till they regain their original dimensions, are completely melted together.
This process is done again and again for about 6 times and the result is a steel plank formed of thousands of overlapping layers since every time the steel is folded the number of the layers doubles.

Step 5: *Fold the steel
The steel plant is cut in 4 pieces. These 4 steel planks are put one on top of the other, heated up and melted together by percussions. (Our bladesmiths would perform this "folding" technique up to 12 times). Each time the blade is folded, it becomes stronger.
In the end, the block will be made of thousands of steel layers. The final product of this long process is a steel plank composed of thousands of overlapping layers with a few millimetres of thickness.

Step 6: *Fold the steel
Depending on how the steel is beaten and folded (always in one direction or in different directions), we'll obtain a different frame on the steel's surface (hada).
At this point the blacksmith begins with the construction of the Shingane (heart steel), starting from a low carbon steel that is moulded, folded up and hit for about 10 times. The same as high carbon steel.
Now it's time to bring everything back together, the Kawagane is bended as a U and the plank of Shingane is inserted in its inner part.


Step 7: Form the blade
The whole is heated up and hit once more until the two layers are completely melted together.
This phase is particularly critical, since the welding has to be very well done and the beating must not displace the two components (the kawagane outside and the shingane inside).
The result of this complicated procedure is a blade with an extremely hard covering that can also be easily sharpened, and a very flexible heart that can easily absorb the shocks without breaking.

Step 8: Shape the blade
Use grinders and files to form the final shape of the blade.
Step 9: Treat the blade with a special clay mixture
Add a mixture of clay and other substances, like grass and feathers, to the blade to achieve desired results. Coat the spine of the blade with the mixture, leaving the edge largely untreated.
This will help make the spine flexible and the edge sharp. Reheat the blade in the forge.

Step 10: Quench the steel
This process both cools and hardens the substance. We usually use water or oil for quenching.
Immerse the blade in water or oil along the edge and tip first. This method has a dual purpose: to make the cutting surface hardest and to keep the back of the blade softer to absorb blows meted out by adversaries. Quenching technique is important as the faster you quench the blade, the harder it becomes.

Step 11: Temper the blade
Reheat the blade to about 400 degrees F (204.4 degrees C) after quenching and then allow it to cool to room temperature.
This process helps balance the blade's flexibility and hardness.
Step 12: Polish the blade
Remove the clay mixture from the blade and grind the blade edge until it is sharp.
Use water stones to sharpen the blade. When polishing is complete, the hardened and unhardened portions of the blade will become apparent. Give the blade a final filing for cosmetic purposes.

Want a unique sword? Feel free to contact us:
Email: lyuesword@hotmail.com
Website: www.lyuesword.com
Custom Sword Page: www.lyuesword.com/Custom-Sword/customization-options/Create-Your-Own-Swords
Recently Reviews
Read MoreLeave a Reply
Your email address will not be published.Required fields are marked. *